EJBCA - TLS Certificate Profile Setup
This example demonstrates how to create a TLS profile in EJBCA for use within certdog
Most of the settings mentioned for a profile are optional, depending on the requirements. But to function with certdog correctly, the following must be configured:
- Allow Subject DN Override by CSR
- Allow Extension Override
- Store Certificate Data
- Use Certificate Storage
More information on these settings is given below
Navigate to the Administration console (e.g. https://myhostname:8443/ejbca/adminweb)
Under CA Functions, select Certificate Profiles
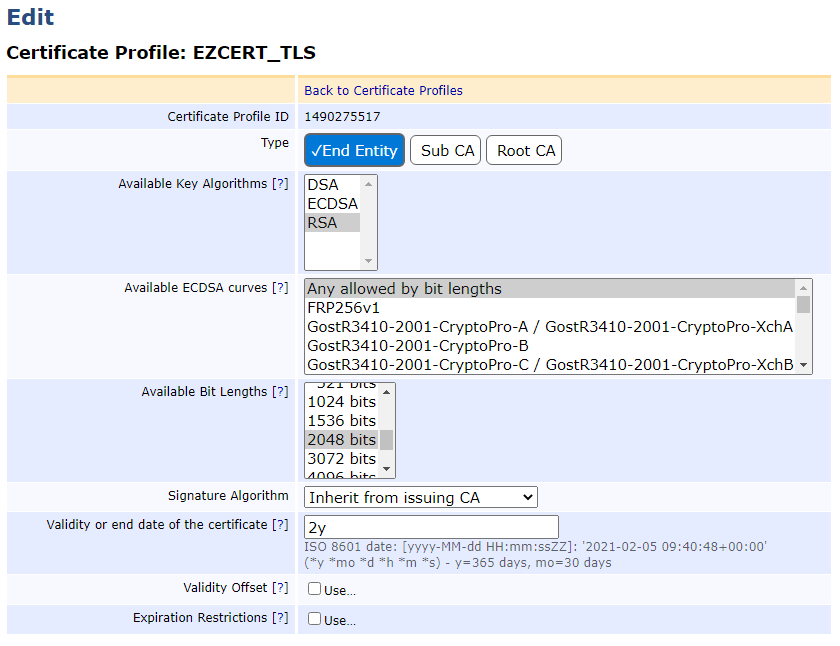
Enter a name for this profile e.g. CERTDOG_TLS and click Add, then click Edit
For the Type, choose End Entity
For Available Key Algorithms, choose an algorithm. certdog supports RSA and ECDSA, for this example, select RSA
For Available Bit Lengths, select 2048
As shown below:

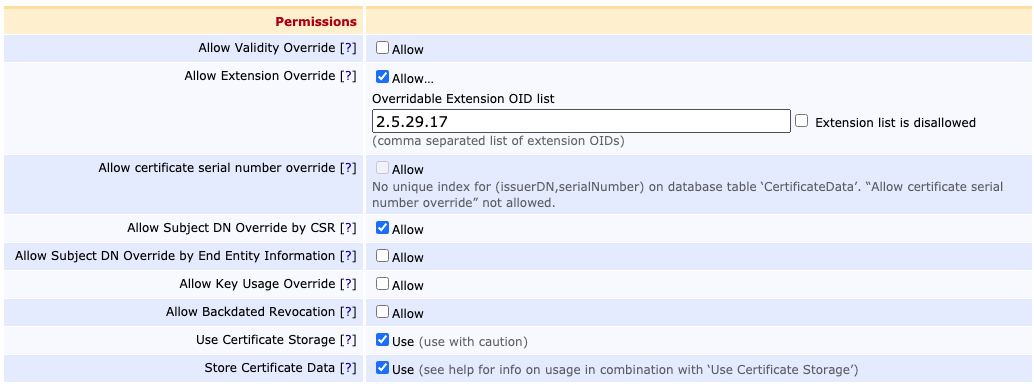
Scroll down and for Permissions, tick
- Allow Subject DN Override by CSR
- certdog will be generating the Subject DN
- Allow Extension Override and enter 2.5.29.17 (the OID for SANs) for the Overridable Extension OID list
- This allows certdog to add SAN (Subject Alternative Names) attributes to requests
- Store Certificate Data and Use Certificate Storage
- These settings store the certificate data enabling certdog to revoke, if required
As shown below:

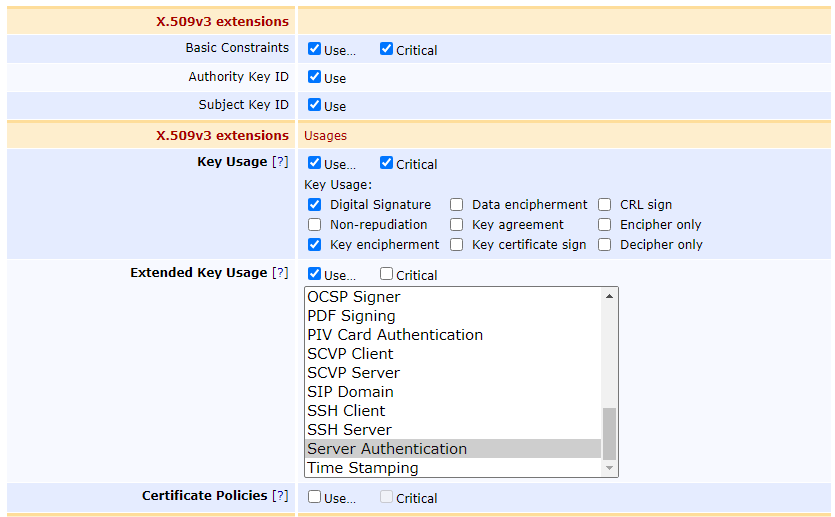
For the extensions, for Key Usage set:
- Digital Signature
- Key Encipherment
For Extended Key Usage, set:
- Server Authentication
- If you plan to use these certificates for client TLS authentication then also select Client Authentication

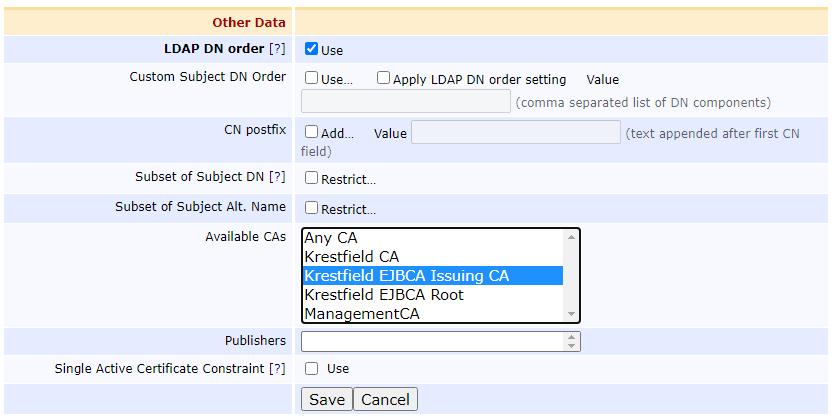
Scroll down to Other Data and optionally, uncheck the box for
- LDAP DN Order
- This orders the DN as CN=name,O=org,C=GB, rather than the LDAP ordering which is C=GB,O=org,CN=name. You may leave checked if you prefer
- Select the CA you wish to be able to issue these certificates

Click Save
Note the profile name you selected as this name is required when configuring certdog