Updating the Database SSL Certificate
A default database certificate is provided with the installation which protects the local database traffic
This certificate is bound to the 127.0.0.1 IP address
If you wish to cluster the database, or access it from another certdog installation then this certificate will need to be updated so that it is correctly associated with the host server
Note: If the database is remaining on the same server as the certdog services and the database network interface is still bound to 127.0.0.1 e.g. .\certdog\mongodb\bin\mongod.cfg includes:
net:
   bindIp: 127.0.0.1
Then the database cannot be accessed externally and no traffic to the database will leave the local network stack.
In this case there is not real requirement to implement TLS. However, it is configured by default as an added layer of protection and to avoid an alteration to the bindIp value that would allow the database to be externally available. The default configuration would prevent this.
Steps
STEP 1: Issue a new Certificate from Certdog
Ensure you have a certificate profile (or template) that can issue an SSL/TLS certificate
Issue a certificate with the following details:
CN=[Database Server FQDN]
Where [Database Server FQDN] is the full qualified domain name of the server where the database resides
E.g.
CN=server1.certdog.local
You may add other fields if required (O, OU, C etc.)
Subject Alternative Names
For the Subject Alternative Names, add the [Datanase Server FQDN] as a DNS entry and any other DNS or IP Address entries as required.
If you will continue to access the database locally at 127.0.0.1 ensure that is added as a IP Address SAN
Issue the certificate then click More to view all the certificate details. At the bottom of the view, click Technical Details:
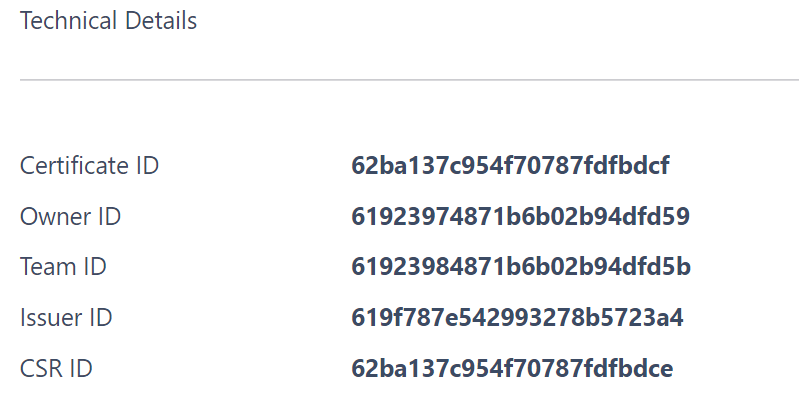
Click on the value displayed next to Certificate ID. This will copy the value to the clipboard. You will need this value in the next steps
STEP 2: Configure the SSL Certificate on the Database
On the server where the Certdog database is running (or the server you wish to be the primary node, if using database replication), open a PowerShell window as Administrator
Navigate to [Certdog Install]\bin e.g. c:\certdog\bin
Run the set-dbsslcert.ps1 script, as shown below. You will need the certificate ID obtained in Step 1 as well as a credential that will login to Certdog to obtain the certificate that was issued in Step 1
PS E:\certdog\bin> .\set-dbsslcert.ps1

Database SSL Configuration
--------------------------

This script will configure the provided certificate as the databases TLS certificate
Run this script to renew or replace the database TLS certificate

You will need the ID of the certificate (issued from Certdog) to successfully run this script
You can obtain this ID by vewing the certificate details in Certdog. Under Technical details
click the value beside Certificate ID to copy this ID to the clipboard
See: https://krestfield.github.io/docs/certdog/update_the_db_certificate.html for more details

Please enter the certificate ID (as obtained from Certdog): 62bec5d554122f00f090fe81

You must now enter credentials for Certdog
These credentials will be used to obtain the certificate from Certdog
Username: user@certdog.local
Password: **********
Attempting login at: https://127.0.0.1/certdog/api
Authenticated OK
Adding alias certdog1 to ..\config\sslcerts\dbssltrust.jks
Certificate was added to keystore
Adding alias certdog2 to ..\config\sslcerts\dbssltrust.jks
Certificate was added to keystore

You must restart the Krestfield Certdog Database and the Krestfield Certdog Service
for these changes to take effect
Next open the Services snapin and stop the services in this order:
- Krestfield Adcs Driver
- Krestfield Certdog Service
- Krestfield Certdog Database
Then starting in this order:
- Krestfield Certdog Database
- Krestfield Certdog Service
- Krestfield Adcs Driver
STEP 3: Configure the SSL Certificate on the Database
If using the ADCS Driver (i.e. interfacing to Microsoft CAs), ensure that the root and intermediate CA certificates that issued the new database certificate have been imported into the Windows store.
You can obtain these by navigating to the issued certificate in STEP 1 and choosing the Actions - Go To Issuer option. Then downloading the certificates (ensuring you download all CA certificates, including the root) and importing into the Intermediate or Trusted Roots store (depending whether the certificate is a root CA or not).
Troubleshooting
To confirm that an issue is certificate related, you may first disable TLS (temporarily), to ensure that without any certificates the connection to the database is OK. See Disable TLS below.
If the service does not start. Attempt a restart again ensuring that the stop and start order is carried out correctly.
Next, analyse the following log file:
C:\certdog\tomcat\logs\catalina.YYYY-MM-DD.log
(Where YYYY-MM-DD is the timestamp when the log was created).
Search for: PKIX path building failed
A full log entry containing this string will look like this:
Caused by: com.mongodb.MongoTimeoutException: Timed out while waiting for a server that matches ReadPreferenceServerSelector{readPreference=primary}. Client view of cluster state is {type=UNKNOWN, servers=[{address=127.0.0.1:27017, type=UNKNOWN, state=CONNECTING, exception={com.mongodb.MongoSocketWriteException: Exception sending message}, caused by {javax.net.ssl.SSLHandshakeException: PKIX path building failed: sun.security.provider.certpath.SunCertPathBuilderException: unable to find valid certification path to requested target}, caused by {sun.security.validator.ValidatorException: PKIX path building failed: sun.security.provider.certpath.SunCertPathBuilderException: unable to find valid certification path to requested target}, caused by {sun.security.provider.certpath.SunCertPathBuilderException: unable to find valid certification path to requested target}}]
The key part here is:
PKIX path building failed: sun.security.provider.certpath.SunCertPathBuilderException: unable to find valid certification path to requested target
And indicates that the certdog service does not trust the DB TLS certificate.
This may be because it was not imported correctly, is not being referenced by the database correctly or does not have the correct attributes. We can check all of these manually next:
Verify the certificate
From certdog locate the TLS certificate that was issued in STEP 1 above and view the details:

- The Subject DN should be the FQDN of the server. E.g. SERVER1.krestfield.local
- The Key Usages should include Digital Signature and Key Encipherment
- The EKU (Extended Key Usages) should include Server Authentication
- The SANs (Subject Alternative Names) should include:
- IP:127.0.0.1 - if you are accessing from the same machine
- DNS: [Server FQDN] - this should be the same as the Subject DN
- You may have additional entries
Open
.\certdog\config\application.properties
And locate the line starting with spring.data.mongodb.uri E.g.
spring.data.mongodb.uri=mongodb://certmanuser:eZAqMcOcVu58RLdoyBb9@127.0.0.1/certman?tls=true
Ensure that whatever DNS name or IP address appears after the @ symbol is included in the certificate as a DNS or IP SAN. E.g. in this case 127.0.0.1 appears after the @ symbol and we have an IP SAN of 127.0.0.1, which is correct.
Under Technical Details, ensure that the Certificate ID is the one that was specified to the script above.
Confirm certificate has been imported into the database
Open a browser and navigate to:
https://127.0.0.1:27017
Note: That if your database is not listening on 127.0.0.1 port 27017 enter the correct IP address (or FQDN) and port. To verify what these values should be analyse the file here:
.\certdog\mongodb\bin\mongod.cfg
Which will have values under the net: heading, as follows:
net:
   bindIp: 127.0.0.1
   port: 27017
The browser should navigate to the address and may show a security warning. From the browser, inspect the certificate protecting this TLS end point. It should match that as generated in STEP 1 above.
Confirm certificate has been imported into the JKS store
Navigate to:
.\certdog\config\sslcerts
And enter the following command:
..\..\java\bin\keytool.exe -list -keystore dbssltrust.jks -storepass temp1234! | findstr certdog
You should see several occurrences named certdogN (e.g. certdog1, certdog2 etc):
certdog
certdog1, 10 Oct 2025, trustedCertEntry,
certdog2, 10 Oct 2025, trustedCertEntry,
certdogtlsroot, 10 Oct 2025, trustedCertEntry,
Verify each of the certificates using the following command - providing the certdog aliases with the -alias switch:
..\..\java\bin\keytool.exe -list -v -alias certdog1 -keystore dbssltrust.jks -storepass temp1234!
These certificates (certdog1 and certdog2) should be the chain certificates. That is the root and intermediate(s).
Verify these are present and as expected. I.e. examine the issuers for the certificate created in STEP 1 above within certdog, comparing the Issuers and Serial Numbers.
When running the command above the only output is the following:
certdogtlsroot, 10 Oct 2025, trustedCertEntry,
This indicates that the new CA certificates have not been imported correctly. Try re-running the set-dbsslcert.ps1 script again, or import manually as described below.
Manually Add to JKS Store
In certdog, navigate to the certificate issued in STEP 1 above. Under Actions, click Go To Issuer. Then, once the page takes you to the issuer (CA) certificate, click Download Options and Certificate (.cer).
If this is not a Root CA certificate, click on Actions - Go To Issuer again and repeat until you have downloaded all CA certificates including the root.
For each of these certificates, run the following command:
..\..\java\bin\keytool.exe -importcert -trustcacerts -alias <alias> -file <ca-cert-file> -keystore dbssltrust.jks
Providing an alias (which can be anything that will help identify the certificate) and the certificate file e.g. certdogca1.cer.
Once any changes have been made ensure that services are restarted.
Disable TLS
To temporarily disable TLS, do the following:
Stop all certdog services.
First take a backup then edit the following file:
.\certdog\mongodb\bin\mongod.cfg
And comment out using the # character (or delete) the tls: section, so the file looks like this:
systemLog:
   destination: file
   path: C:\certdog\mongodb\mongod.log
   logAppend: true
storage:
   dbPath: C:\certdog\mongodb\dbfiles
   journal:
      enabled: true
processManagement:
   pidFilePath: C:\certdog\mongodb\mongod.pid
net:
   bindIp: 127.0.0.1
   port: 27017
#   tls:
#        mode: requireTLS
#        certificateKeyFile: C:\certdog\mongodb\..\config\sslcerts\dbssl.pem
#        allowConnectionsWithoutCertificates: true
setParameter:
   enableLocalhostAuthBypass: false
replication:
   replSetName: replocal
security:
   authorization: "enabled"
Save the file.
Next, backup then edit the following file:
.\certdog\config\application.properties
Locate the mongodb.uri and remove the ?tls=true part from the end. E.g. the line will look like this:
spring.data.mongodb.uri=mongodb://certmanuser:eZAqMcOcVu58RLdoyBb9@127.0.0.1/certman?tls=true
After editing, like this:
spring.data.mongodb.uri=mongodb://certmanuser:eZAqMcOcVu58RLdoyBb9@127.0.0.1/certman
Save the file.
Start the services, ensuring the database service is started first.