Certdog Venafi Integration
Certdog can host multiple Certificate Authorities. Certificates from these CAs can then be managed via Venafi
Pre-requisites
Certdog is installed and configured such that it is able to issue certificates
There is connectivity between the Venafi server and the Certdog server. Venafi will make REST API calls to the Certdog server, by default these will be made over port 443 (TLS) so ensure that traffic is permitted from the Venafi server to the Certdog server over this port
Setup Steps
Certdog Steps
-
Ensure you have a Certificate Issuer configured. In this example our Issuer is called TLS Certs. For details on how to create a certificate issuer in Certdog see here
-
In Certdog, create a team e.g. Venafi Team
-
In Certdog, create a user with a username such as venafi and give it a strong password
-
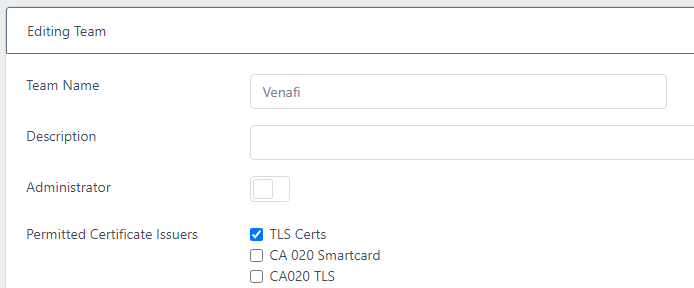
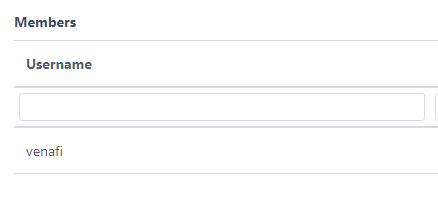
Add the user to the team just created (e.g. Venafi Team) and configure the team to have access to the Certificate Issuer(s) required
In the example below, the venafi user will be a member of the Venafi Team and this team will have TLS Certs configured as a Permitted Certificate Issuer:
- Verify that you can authenticate to Certdog with the venafi username and password (e.g. by logging on via the UI or REST API)
Venafi Steps
Obtain the certdog.ps1 script from here or on GitHub
Copy the certdog.ps1 script to your Venafi servers at this location:
C:\Program Files\Venafi\Scripts\AdaptableCA\certdog.ps1
Adjust if your Venafi system was not installed to the default C:\Program Files location
Copy the script to every engine in your Venafi system and ensure the file is copied (rather than copy and pasting the contents) as slight variations (e.g. an extra space) in the files between engines will cause Venafi to reject the script
Now configure a Username Credential in Venafi, supplying the user details created in Certdog above e.g. username = venafi, password = [strong password]
Next, configure an Adaptable CA template:
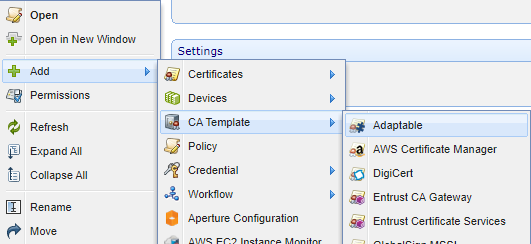
Give the template a name and select the Username Credential just created
For Service Address, enter the certdog URL e.g. https://server1.certdog.local/certdog
For Profile String, enter the Certificate Issuer name (e.g. TLS Certs) as configured in Certdog
For the PowerShell Script, click the down arrow and a script named certdog should be present. Select this
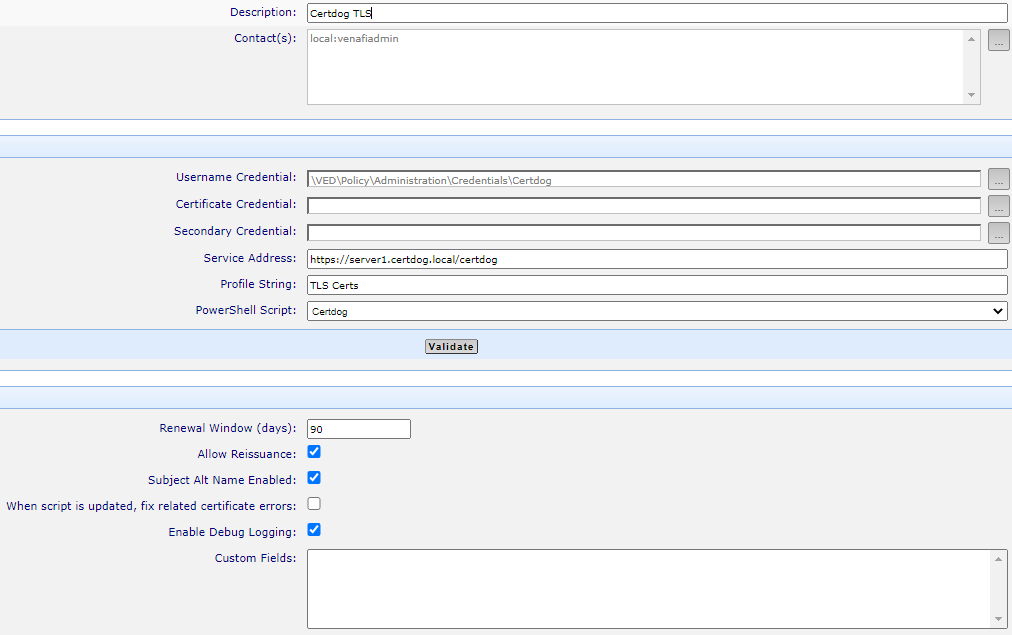
Initially at least, select Enable Debug Logging as this will help troubleshoot any issues
Click the Validate button. If all is good, you should get dialog as follows
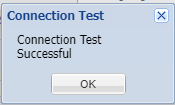
Click OK then Save
If there are any errors and the connection test fails, from the Venafi server, navigate to:
C:\Program Files\Venafi\Logs
There will be log entries starting with the name of the script e.g.
Certdog_{b93c7e3b-106e-439b-a4d1-9803da96ec6e}_debug.log
Choose the latest one and open. Scroll to the bottom of the log file to locate the most recent error. This will show any error messages e.g. the following indicates that the credential details were not correct:
08/23/2022 15:21:25 Test-Settings
08/23/2022 15:21:25 There was an error The remote server returned an error: (401) Unauthorized.
08/23/2022 15:21:25 @{timestamp=2022-08-23T15:21:25.354+00:00; status=401; error=Unauthorized; message=Failed to log in with the details provided; path=/certdog/api/login}
If you have several Venafi engines capable of processing the script, the log files may be placed on any of those servers. So, if you do not see any log files on one of the servers, look on the others
You may also examine the logs from Certdog itself which may give more information about the error
Alternative Teams
If you want to use an existing user account and that user is a member of more than one team, edit the Certdog.ps1 script, setting the $global:teamName variable to be the team you wish to be associated with certificates issued from Venafi e.g.:
$global:teamName = "Venafi Team"
The updated script must then be re-copied to the Venafi engines