Create a Local Certificate Issuer
A Local Certificate Issuer enables you to issue certificates from a certdog controlled CA
A Certificate Issuer combines a Local CA (Certificate Authority) and a Certificate Profile
Before creating a CA you must have configured a Key Store. See here for instructions on how to create one
1. Create a Local CA Configuration
Select Local CA > CA Configuration from the menu and click Add New CA
Complete the following details:
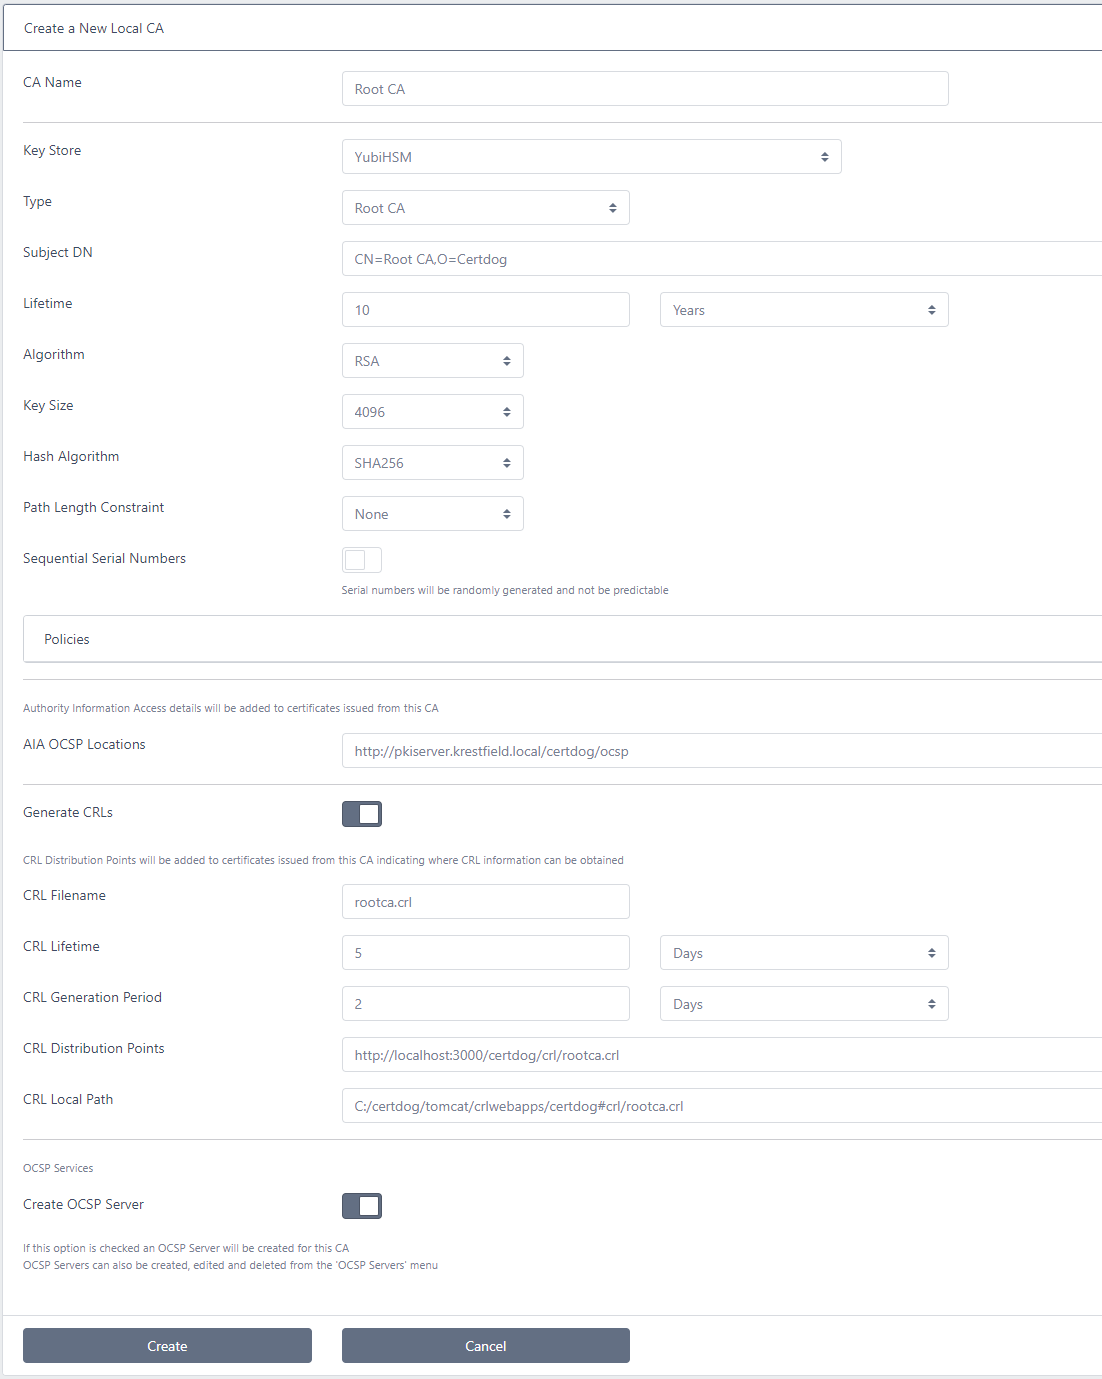
Main Certificate Authority Details
-
CA Name: Enter a name for this CA
-
Key Store: Choose from the drop down the Key Store that will be used to generate and store this CA’s keys. See here to create a key store
-
Type: You can create a Root CA (self-signed) or an Intermediate CA. A complete hierarchy of CAs can be configured with no limit to the chain length
If you choose Intermediate CA you also have the options: Local CA or External CA (Generate a CSR)
Choose Local CA if you want to issue this intermediate CA from an existing Local CA
Choose External CA if you want to generate a CSR for processing by an external CA - such as an existing Root CA (e.g. a Microsoft Root). See the section Processing a CSR from an External CA below for details on processing a request
-
Issuer: If you select Intermediate CA and Local CA in the options above, a list of available parent CAs (issuers) will be displayed. Select the CA to be the parent/issuer CA (i.e. the CA that will issue this CA’s certificate)
-
Subject DN: Enter the CA Distinguished Name
-
Lifetime: Specify the life of this CA. Note that if an Intermediate CA’s lifetime is set to exceed that of the issuer, it will be automatically reduced to be equal to the issuers i.e. you cannot issue an Intermediate CA with a longer life than its parent
Note that this option is not available if External CA was selected above, since the issuing CA will determine this value when it issues the certificate
-
Algorithm: Select RSA or ECDSA as the algorithm used to generate the CA keys
-
Key Size: If RSA is selected, set the RSA key size
-
Curve: If ECDSA is selected, set the name for the elliptic curve
-
Hash Algorithm: Set the CA’s hash algorithm
-
Path Length Constraint: Set the path length constraint (that will appear in the Basic Constraints extension).
Note that this option is not available if External CA was selected above, since the issuing CA will determine this value when it issues the certificate
-
Sequential Serial Numbers: If left unchecked, serial numbers are generated randomly and are ensured of uniqueness. They will not be predictable. If checked, serial numbers will be incremented by one for each certificate issued from this CA and are thus predictable. In this case the starting serial number will be randomly generated
If you chose to Issue From an External CA above, the following options (Policies, Extensions and CRL Generation) will not be available. This is because it will be the issuing CA that will decide on these values when it issues the certificate
Policies
If you wish to add policies to the CA certificate. Click Policies:
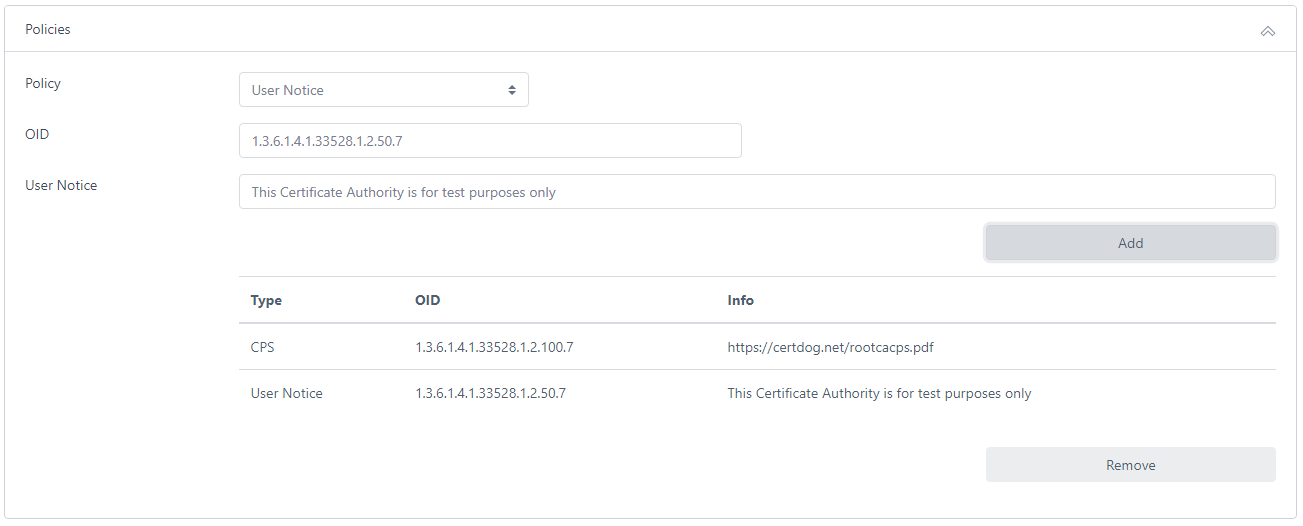
For Policy type, choose from:
-
OID Only
Specify an OID as a policy entry
-
User Notice
Specify an OID as well as notice text
-
CPS
Specify an OID as well as the URL that references the CPS (Certificate Policy or Certificate Policy Statements) document
Populate the fields and click Add. You may add as many policy entries as required
Once the CA is configured, the above options (main details and policies) are fixed and cannot then be changed. You may delete and re-issue a CA but you cannot change its lifetime, algorithm, policies etc. as they are part of the CA certificate
Extensions
-
AIA OCSP Locations: Enter a URL (or list of OCSP URLs separated by commas). These locations will be included in the AIA (Authority Information Access) OCSP extension of all certificates issued by this CA and relate to where the certificate status can be obtained via OCSP
E.g. http://server1.com/ocsp
If the option Create OCSP Server is selected (see below) this field will be populated for you, but you can still adjust manually
-
AIA Issuer Cert Locations: Enter a URL (or list of URLs separated by commas). These locations will be included in the AIA (Authority Information Access) extension of all certificates issued by this CA and relate to where the CA certificate can be obtained
E.g. https://server3.com/ca1/cacert.cer
See Configuring the AIA Issuer Cert Location below for more details on setting this value
CRL Generation
-
Generate CRLs: If you want this CA to generate CRLs, enable this option
-
CRL Filename: Enter the name of the CRL filename e.g. rootca.crl
-
CRL Lifetime: This is the lifetime of the CRL i.e. the period between the Effective date and Next update values in the CRL
-
CRL Generation Period: This is how often you want the CRL to be generated. It must be less than the CRL Lifetime (set above). For example, if the lifetime were set to 2 days, you may set this to 1 day so there is always a 1 day overlap
-
CRL Distribution Points: Enter a URL (or list of URLs separated by commas). These locations will be included in the CRL Distribution Points extension of all certificates issued by this CA and relate to where the CRL issued by this CA can be obtained
E.g. http://server1.com/crl/ca1.crl,http://server2.com/crl/ca1.crl
This value will be pre-populated with a default URL hosted on the certdog server
-
CRL Local Path: This is the local location where the CRL file will be placed when generated. See the Notes on the CRL Filename and CRL Distribution Points section below for more details
The above options (Extensions and CRL Generation) can be edited later if required)
OCSP Services
-
Check the Create OCSP Server box if you would like an OCSP responder to be configured for this CA
-
If you check this option, all items required for the operation of an OCSP responder will be created and there will be nothing more to do. However, you can always edit these settings from the OCSP Servers menu. See here for more details
Click Create
If you chose to Issue From an External CA above, the option will be Create CSR. See the section Processing a CSR from an External CA below for details on processing this CSR
2. Create a Certificate Profile
Select Local CA > Profiles from the menu and click Add New Profile
See Create a Local Certificate Profile for details on creating profiles
3. Create a Certificate Issuer
Select Certificate Issuers from the menu
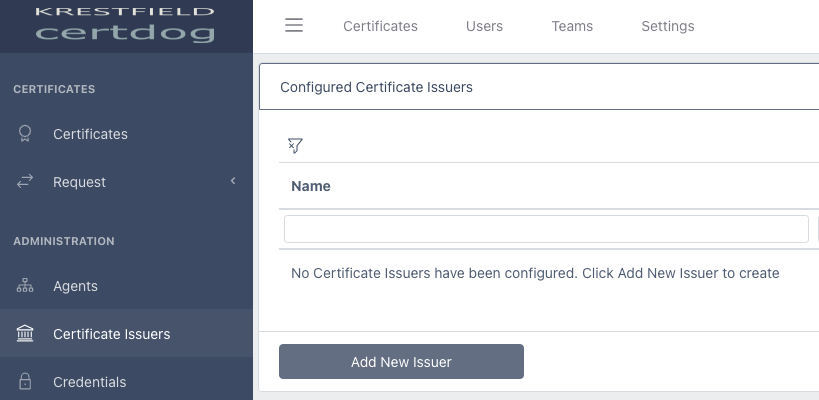
Click Add New Issuer
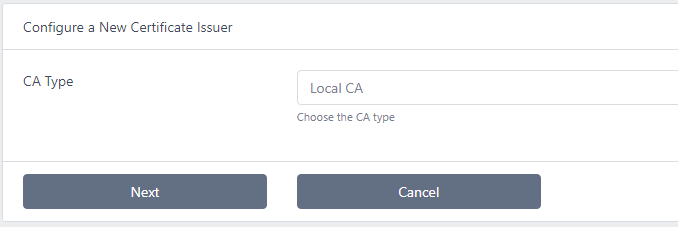
From the drop down select Local CA and click Next
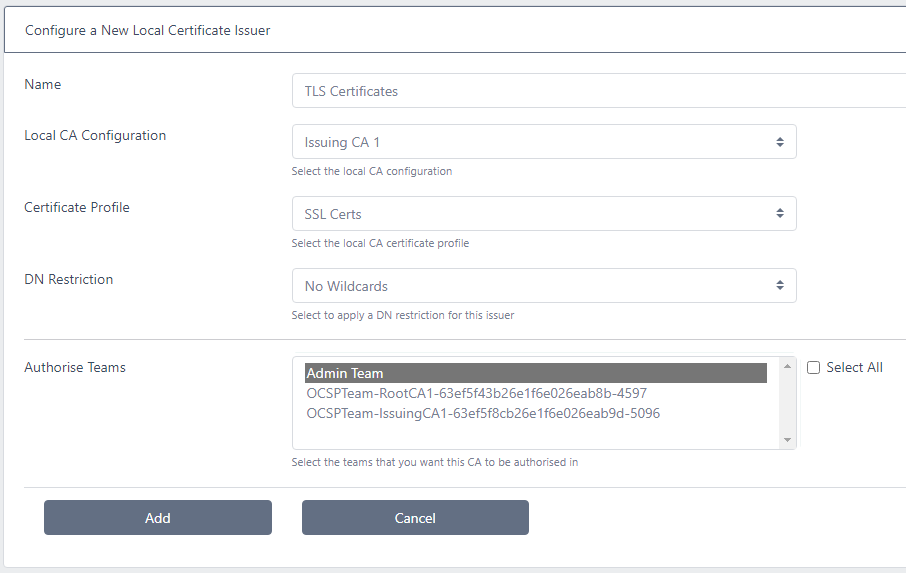
Enter a Name and select the Local Configuration and Certificate Profile as just created from the drop downs
If required, select the DN Restriction. See here for more details on configuring DN restrictions
Select the Team(s) that will be authorised to use this issuer. Members of these teams will be able to issue and revoke certificates
Click Add
If you wish to request a certificate by just providing a DN i.e. with certdog generating the CSR on your behalf, then a CSR Generator must be available. See Create a CSR Generator
Notes on the CRL Filename and CRL Distribution Points
By default certdog runs a non-ssl (http) server to host CRLs. This is the standard for hosting CRLs (which are public, signed files and do not need to be hosted on SSL (https) sites)
When you enable the Generate CRLs option a default CRL Distribution Point URL and CRL Filename will be populated
If you do not wish to accept the defaults they can be changed, but note the following:
The CRL Filename and CRL Distribution Points entries must align. i.e. they must reference the same file and the location referenced by the CRL Distribution Point must be where the CRL Filename is served from
By default, CRLs are hosted on the filesystem here:
[certdog install]/tomcat/crlwebapps/certdog#crl
A file that is stored in this folder will be available via an http URL. For example, if your host server were referenced by certdog.krestfield.com and the file ca1.crl were placed in the certdog#crl folder then the URL it would be available at would be:
http://certdog.krestfield.com/certdog/crl/ca1.crl
This would then be your CRL Distribution Point, that would be included in certificates so end systems could download the CRL
Note that this URL will default to 127.0.0.1 (e.g. http://127.0.0.1/certdog/crl/ca1.crl) until the System URL is updated in the Email Settings. Once this has been done the system will recognise the referenced URL and use it to populate items such as the CRL URLs correct.
Note: Some systems fail to recognise the file system correctly, so check that the pre-populated file location is correct e.g. ensure the folder exists and is below the tomcat directory. If this is not the case, the web server will fail to serve the CRL
But if you wanted to change this you could add another folder under the crlwebapps location e.g.
[certdog install]/tomcat/crlwebapps/myca
And set the CRL Filename to then be
[certdog install]/tomcat/crlwebapps/myca/ca1.crl
Which would result in a CRL Distribution Point of
http://certdog.krestfield.com/certdog/crl/myca/ca1.crl
You also have the option of hosting the CRL on another host server. In this case, set your CRL Filename to a location of your choice and configure a scheduled task (or similar) to copy the generated CRL to your host. Just ensure that whatever the host resolves to is set as the CRL Distribution Point
Configuring the AIA Issuer Cert Location
The AIA (Authority Information Access) Issuer Cert Location contains a URL (or several) that are added as an extension to all certificates issued from the created CA. It can reference the issuing authority’s (i.e. the CA) certificate to assist in path building
To reference the CA certificate, export the certificate and place it at a location that is available to all entities that will be relying on the certificates. This could be an external web site site or LDAP location
This can also be hosted on the certdog server itself (e.g. you could place the CA certificate ca1.cer at [certdog install]\tomcat\myca). Then set the AIA Location to the URL that can access this location e.g. http://certdog.krestfield.com/myca/ca1.cer
Note that the issuing certificate is not usually provided in this way for root CAs, as end systems should already have the root CA certificate installed in order to trust it
Processing a CSR from an External CA
If an external CA will be issuing the certificate, after clicking Create CSR, select the created CA entry from the list and choose View/Edit
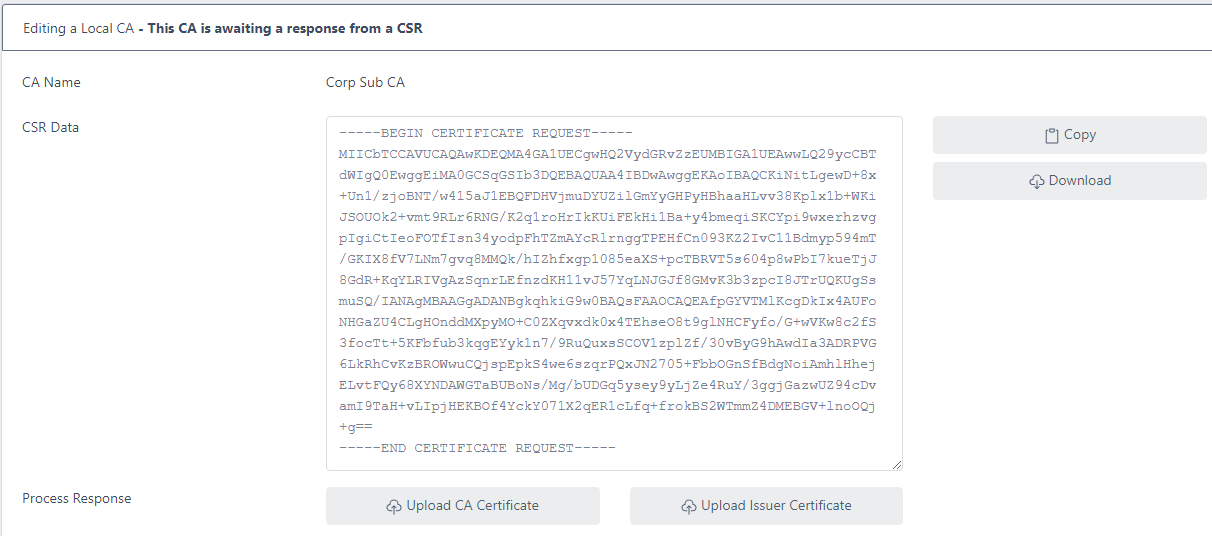
The status will be shown as This CA is awaiting a response from a CSR
The CSR can be downloaded (or copied to the clipboard) for processing at the Issuing CA
Once the certificate has been issued, obtain the issuing CA certificate (e.g. the Root CA certificate) as well as the certificate issued from the CSR
Click the Upload CA Certificate button and navigate to the certificate issued from the CSR
Click the Upload Issuer Certificate button and navigate to the issuing CA certificate (e.g. the Root CA certificate)
Click Accept